PCB
PCB marking and ID numbers
To keep our PCBs consistent, from now on we only include these two marks on the PCBs:
- Fly4Future Logo
- Unique ID in a form of a QR code (added in PCB ordering process at JLC)
No other name/ID should be present on the PCB.
When you design a new PCB, include all the required data into this google sheet.
https://docs.google.com/spreadsheets/d/1cUex4Z-YMlOvQAZUXa6n_Je-SazqNtf1MK0crxlv0BA/edit?usp=sharing
the sheet will give you an unique ID, so that we can easily know which particular version or production run of a board we are dealing with.
Fill out these fields:
- Board name - Capital leters will be included into the ID, so RoboCore Test Board = RCTB
- Designer Name - Name of the PCB designer
- Revision - e.g. 2.1
- Order date - approximate date of when the PCB was ordered (or submitted in the JLC shopping cart)
- Git Hash - the first 7 characters of the git commit, which contains the source and production files for this board
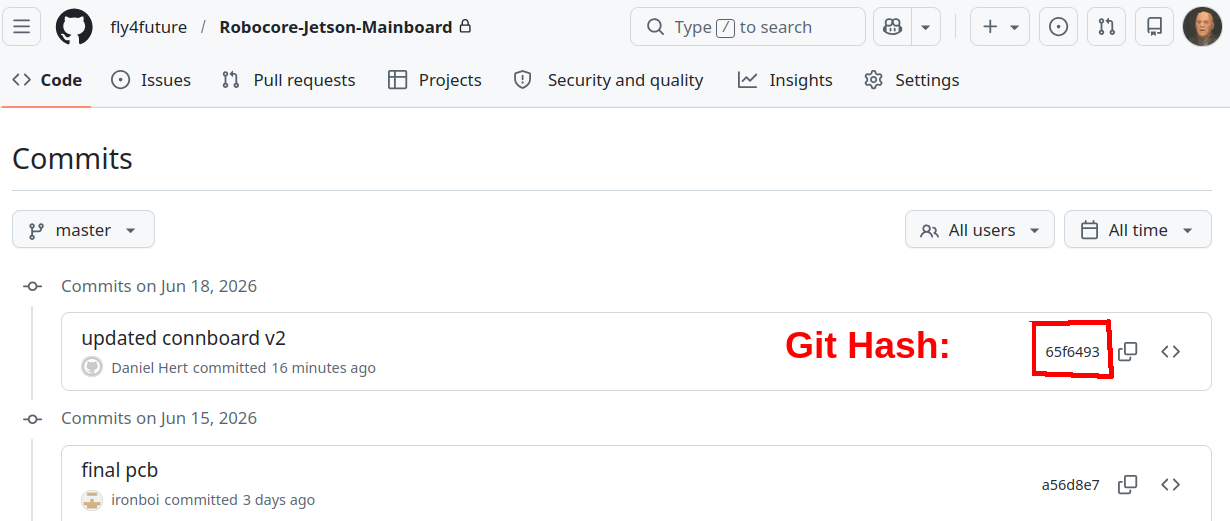
After you fill out the data, the table will generate a unique ID, which contains all the above info, in the Board ID (For JLC) collumn. There are 2 versions - short and long, the short version fits into a 5x5mm QR code, the long version fits into an 8x8mm QR code. example:
- RCCB_LADH_2.0_160626_65f6493 (long) or 160626_65f6493 (short)
We then include this id on the PCB, via the JLC PCB add barcode option:
![]()
In the following dialog, check the options according to this image, and include your serial number in the Prefix:
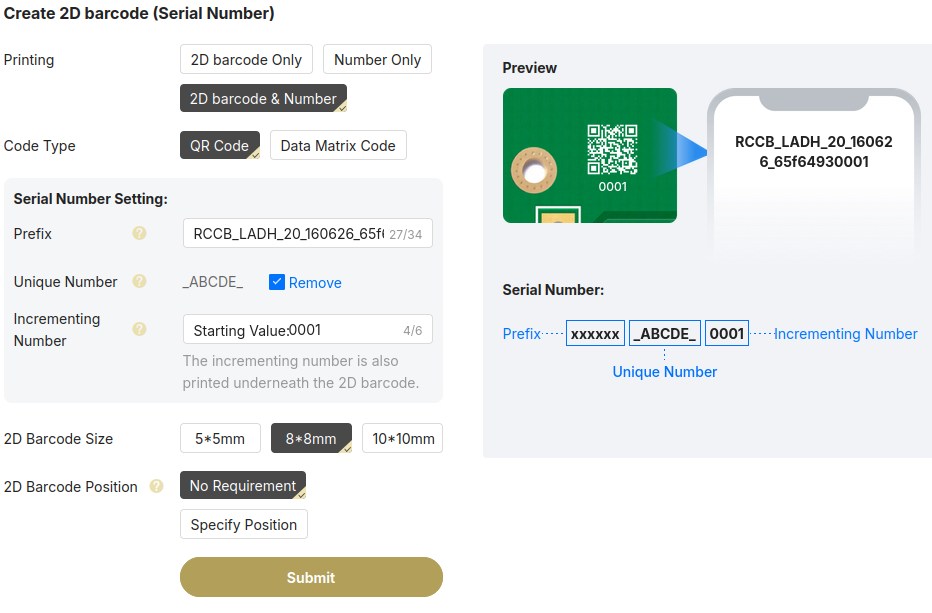
You can choose a 5x5 QR code for a small board and include the short ID, or choose the bigger QR code if you have space for it, with the long ID.
We also want the incrementing number - this will give each board a sequential number. You can also specify the QR code position if you want it in a particular place.