Post-Install Configuration
After installing the core software, the setup utility provides post-installation configuration scripts. These are found under menu option 3 (PostInstall) and menu option 4 (Network).
Post-Install Scripts
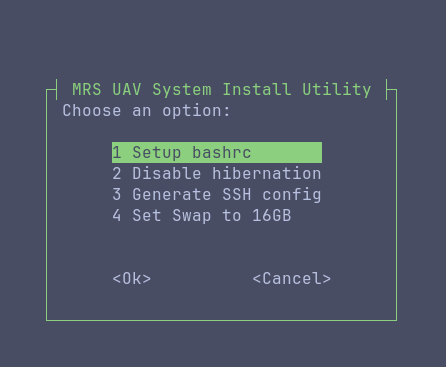
3.1 Setup Bashrc
Launches an interactive wizard that sets essential environment variables in ~/.bashrc. Each variable is presented with a description and default value that you can accept or modify.
This step is covered in detail in Bashrc Variables.
3.2 Disable Hibernation
Disables system hibernation and suspend. This is important for UAVs because the onboard computer must never go to sleep during operation.
3.3 Set Swap to 16GB
Creates or resizes the swap file to 16GB. This is required to avoid running out of memory during workspace compilation, especially on NUCs with limited RAM.
The swap size is validated by uav_check. If swap is below ~16GB, the check will fail. Always run this step on a fresh install.
Network Configuration
Network scripts are under menu option 4 (Network).
4.1 Fix Network Interface Names
Renames network interfaces to standard names (eth0, wlan0, etc.). Many Ubuntu installations use unpredictable interface names (like enp0s31f6 or wlp82s0). The MRS system and netplan configuration expect the standard names.
Run this step before configuring netplan.
4.2 Configure Netplan
An interactive wizard that generates a netplan configuration file (/etc/netplan/01-netcfg.yaml). When run with the F4F utility, it uses F4F-specific defaults:
- WiFi static IP:
192.168.12.10X(where X is the UAV number) - WiFi gateway:
192.168.12.1 - WiFi SSID:
f4f_robot - WiFi password:
mikrokopter - Ethernet: configurable as DHCP or static (default static:
10.10.20.10X), the address might change depending on the sensors you need to connect to the UAV (e.g. Livox LiDARs use192.168.1.Xby default)
According to the sensors you need to connect to the UAV, you might need to change the default IP address for the ethernet interface. For example, if you are using Livox LiDARs, you will need to set the ethernet IP address to 192.168.1.10X. So it is recommended to confirm the HW requirements, you can always change the IP address later and reapply the netplan configuration with sudo netplan apply.
The wizard will:
- Optionally delete any previous netplan configs
- Configure each detected ethernet interface (
eth0,eth1, ...) - Configure each detected WiFi interface (
wlan0,wlan1, ...) - Show the generated netplan for review before applying
4.3 Disable Network Manager
Disables NetworkManager in favor of systemd-networkd (used by netplan). This should be done on all UAVs to ensure consistent and reliable network behavior.
4.4 Re-enable Network Manager
Reverses the previous step. Only use this if you need NetworkManager back (e.g., for debugging on a desktop).
The recommended order for network setup is:
- Fix network interface names
- Configure netplan
- Disable network manager
- Reboot to apply all changes